In this article I’d like to share some tips and tricks on how to start the design of a low-poly and isometric city for a printed poster. All you need is a pen, Blender and a loooot of time 😊 and to follow some easy rules.
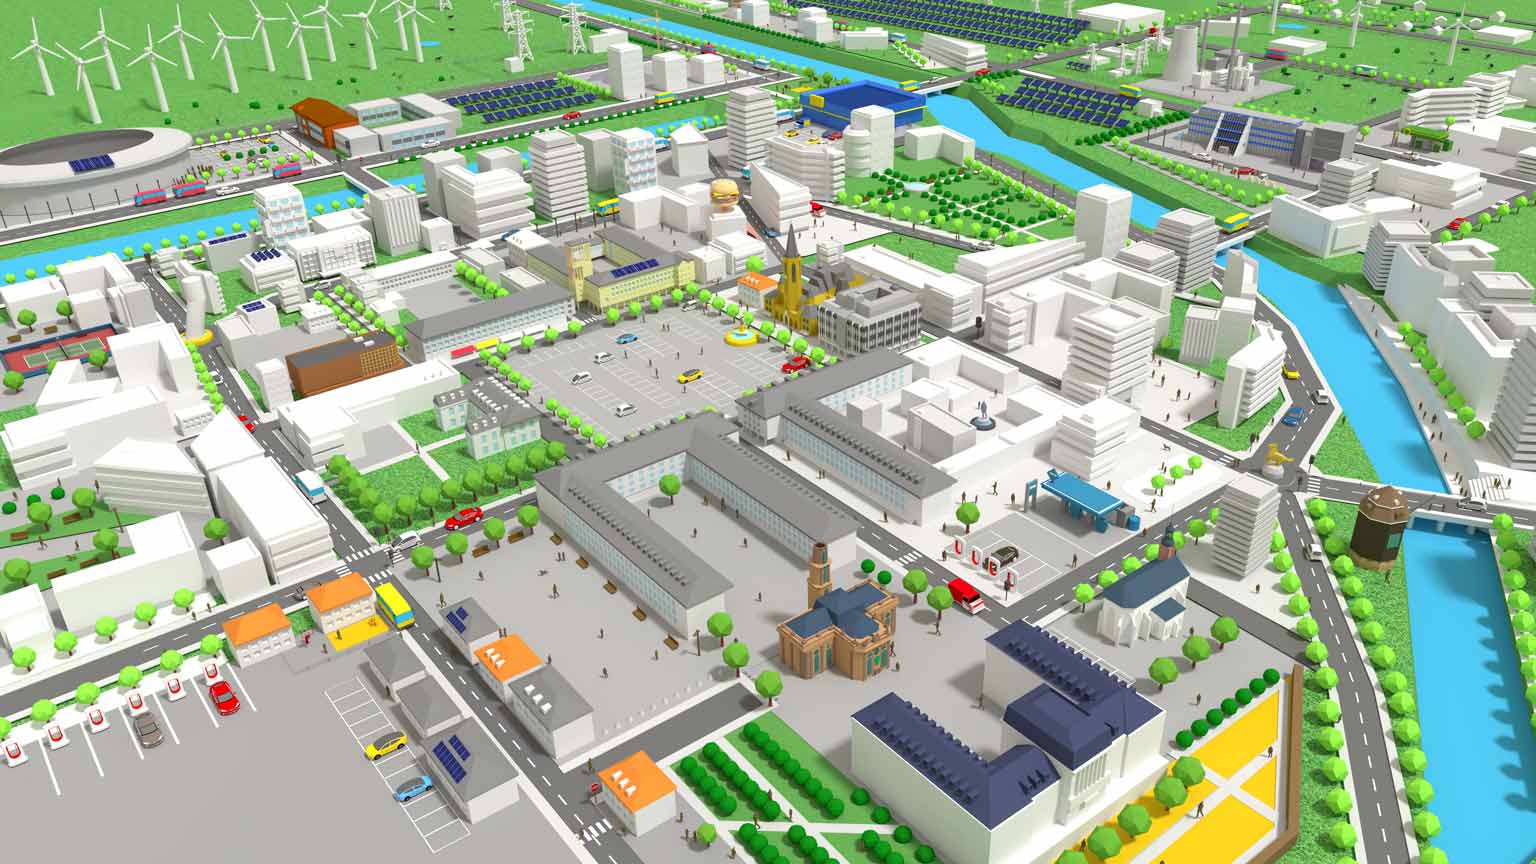
In my former job at DFKI we wanted to present several AI-based sustainable energy solutions we have developed with partners from two cities in Saarland: Saarbrücken and Saarlouis. Both cities are about 20km far away from each other but “share” one common river: the Saar. Based on this I’ve decided to virtually combine these two cities and to build a new virtual one, that would integrate their popular places (Saarkran, Ludwigskirche, Rathaus, Großer Markt) and of course the buildings of our project partners. But how to achieve this? In the following I will give you a few tips I’ve used during the creative process that you might also apply to your own creation process!
Tip #1: Start to draw your idea with a pen and a piece of paper.
The first thing to do is to know what you’d like to draw. Sounds easy? Not really, because you need to decide which buildings, places, and streets/rivers you want to have on your map.
Make a list and select them based on criteria (touristic, social meeting places, commercial). Don’t forget the nature (rivers, trees, parks, etc…) and historical places.
Ask friends to review your design and try to include their feedback and ideas. Ask them targeted questions such “Show me your favorite supermarket or bar, Can you locate the fountain XYZ?. Is the church recognizable or should I place some buildings around it? Should I put more details on this wall?”
Even if you think the questions are easy, believe me, this feedback is highly valuable: if your own friends are not able to recognize the place or building, no tourist will. Which obviously means you need to revise your modelling skills or put some more effort into modelling. 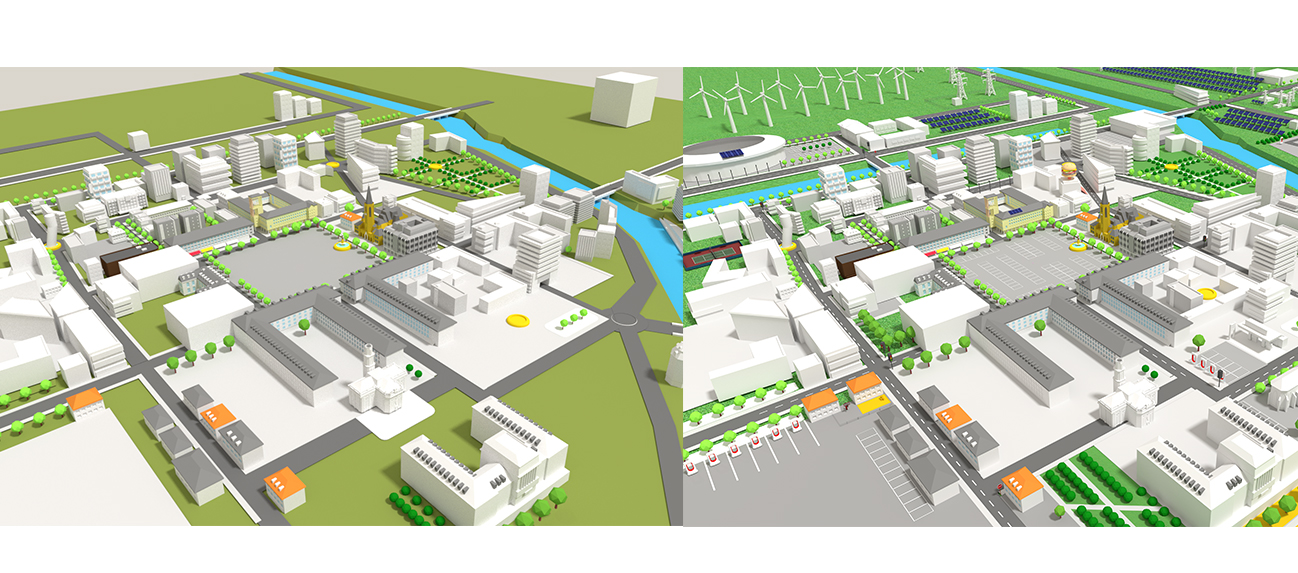
First tests and placement of the buildings. Notice that some buildings have no textures and the a few places in the city are completely empty.
Tip #2: Decide what you really want to highlight.
If you answer, “everything in the town”!”, then you are missing an important point: you will not have the place to design each building with high-fidelity textures and with high geometrical complexity as you are working in a low-poly world.
Consider that you don’t need to create each rooftile of a roof or each stone of a pavement. Some few stones placed here and there will also give a visual touch and hints, that the street is paved or that the rooftiles are old (use position displacement strategies to give this visual aspect).
The picture above shows one of the very early versions of the "Großer Markt" in Saarlouis. The purpose was also to check if the scale and the details of the historical buildings are matching.
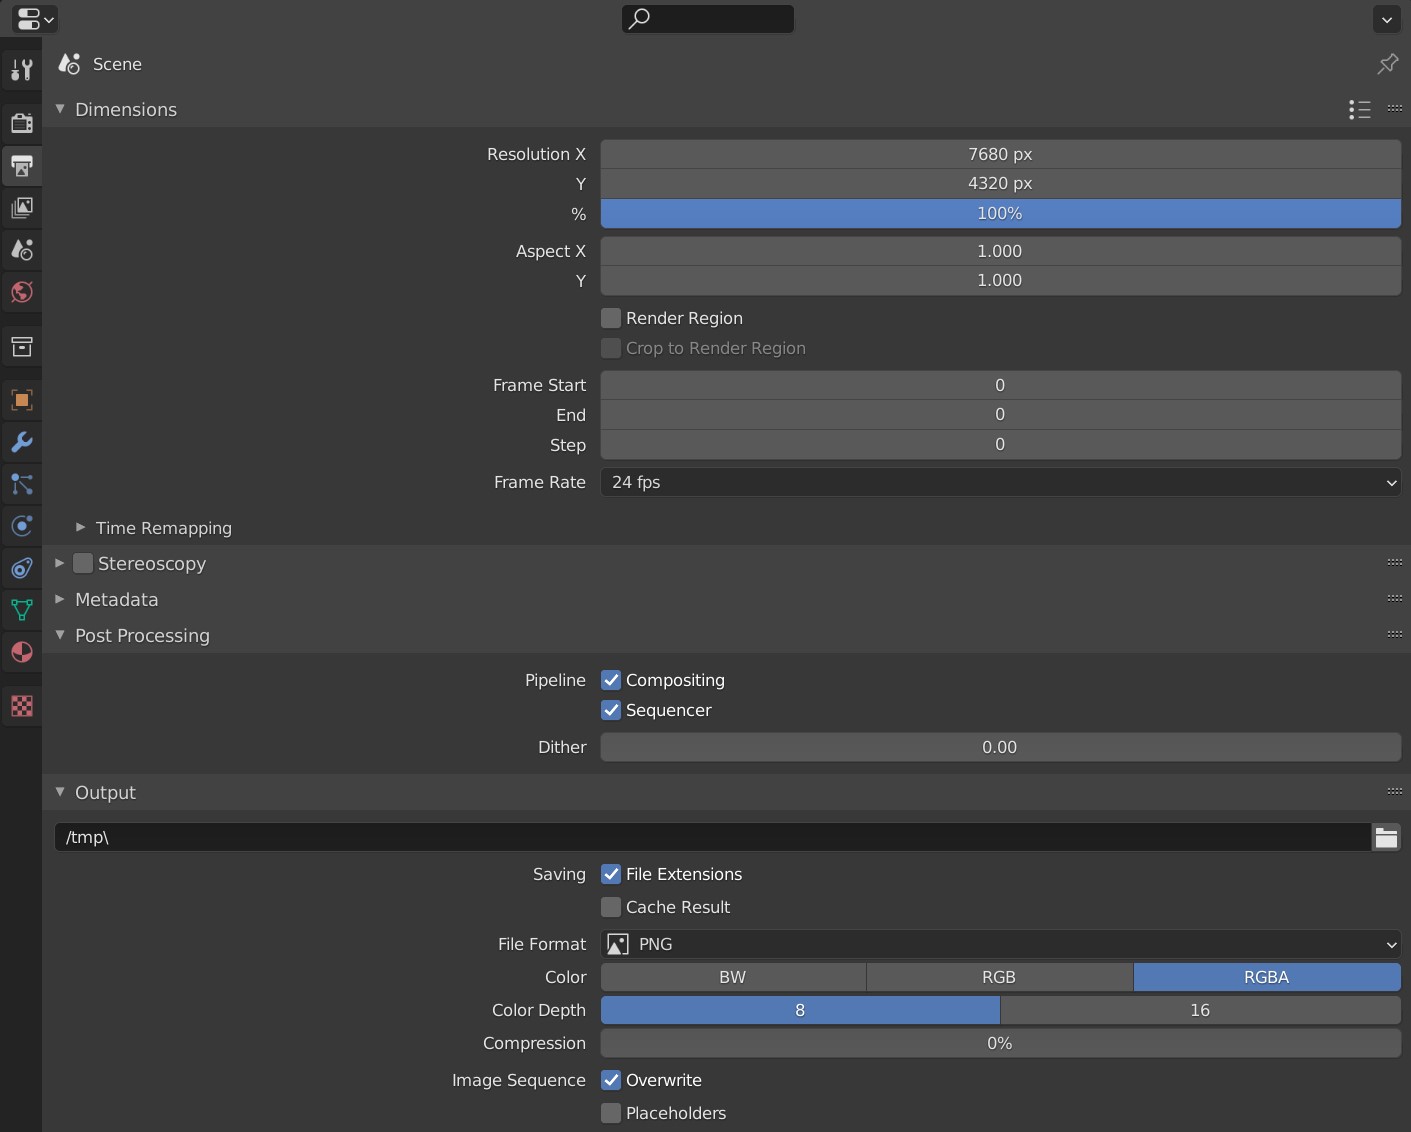
Also have the final result in your head and the scene’s proportions: are you planning to design a DIN A2 poster or rather a digital 4K presentation of your city? This decision has a direct impact on what you are going to render and the render’s viewport. No need to model a huge city if you are only going to focus on a single quartier. Fortunately Blender has several options for rendering and output settings.
Tip #3: Prepare your work with a lot of pictures and plans.
The preparation of 3D-modelling starts by collecting data about the city. But in some cases, it’s easier said than done.
When I’ve started to design this virtual city, I had absolutely no architectural plans of the buildings. I’ve used Wikipedia to approximately have the proportions of the buildings and then used a lot of public domain pictures of the buildings taken from several angles to model them into Blender.
A good visual comparison and turning several times Blender's cameras, to check if the proportion of the building at the ground are plausible are necessary. If you are modelling a famous city like Paris, it’s obvious that the Eiffel Tower must be taller than the Arc de Triomphe: if not, there’s a huge scale problem that might also lead you to remodel/rescale the width of the street and the surrounding.
Of course, as they are low poly a lot of details can be “omitted” thus gaining a little bit of rendering time and having slight creative freedom. Some buildings needed to be “adapted” a bit, meaning that some special architectural characteristic details (gutter, gargoyles, statues) had to be more prominent to make even at a smaller scale the building still recognizable.
Tip #4: Detailed or not very detailed?
This is an important question that might stop your creative process within Blender. When you start modeling based on pictures you have the tendency to put a lot of time in modelling details (like statues, gargoyles, rooftiles, chimneys…). But don’t forget that the final rendered building will be very small and due to shadow castings or textures some architectural details might even be occluded or not visible. Here are some examples of buildings I’ve simplified on purpose.
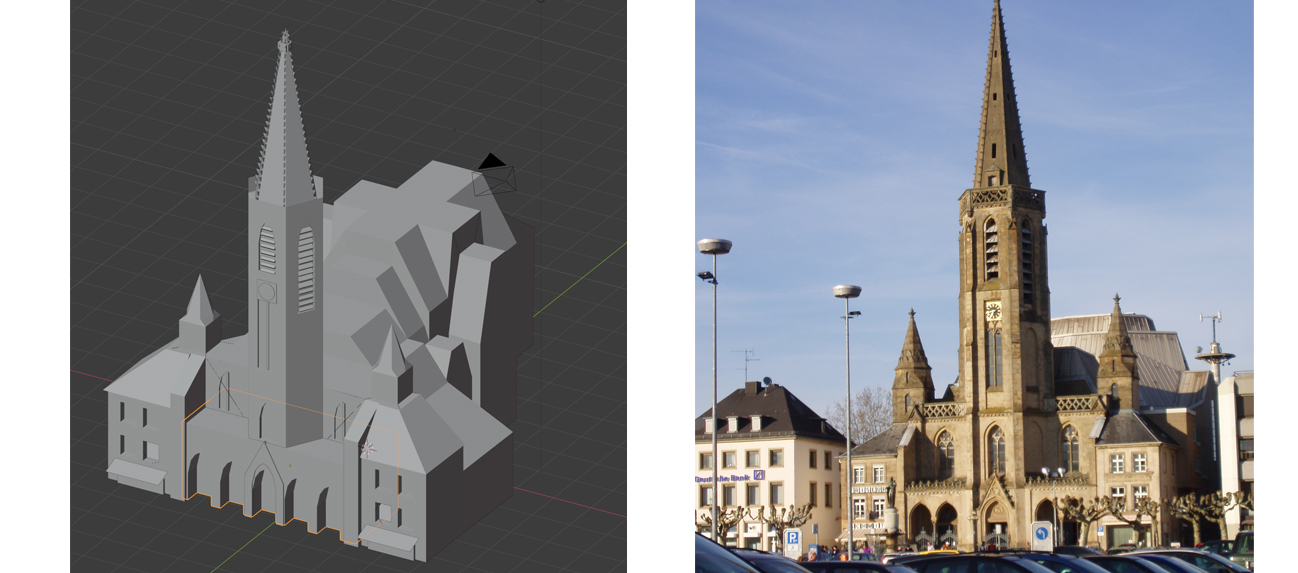
St Ludwig in Saarlouis
The St Ludwig (Saint Louis Church) was obviously one the most complex building to model. But knowing that the building will have some hard to reproduce details like the roof, I’ve decided to simplify it a little bit.
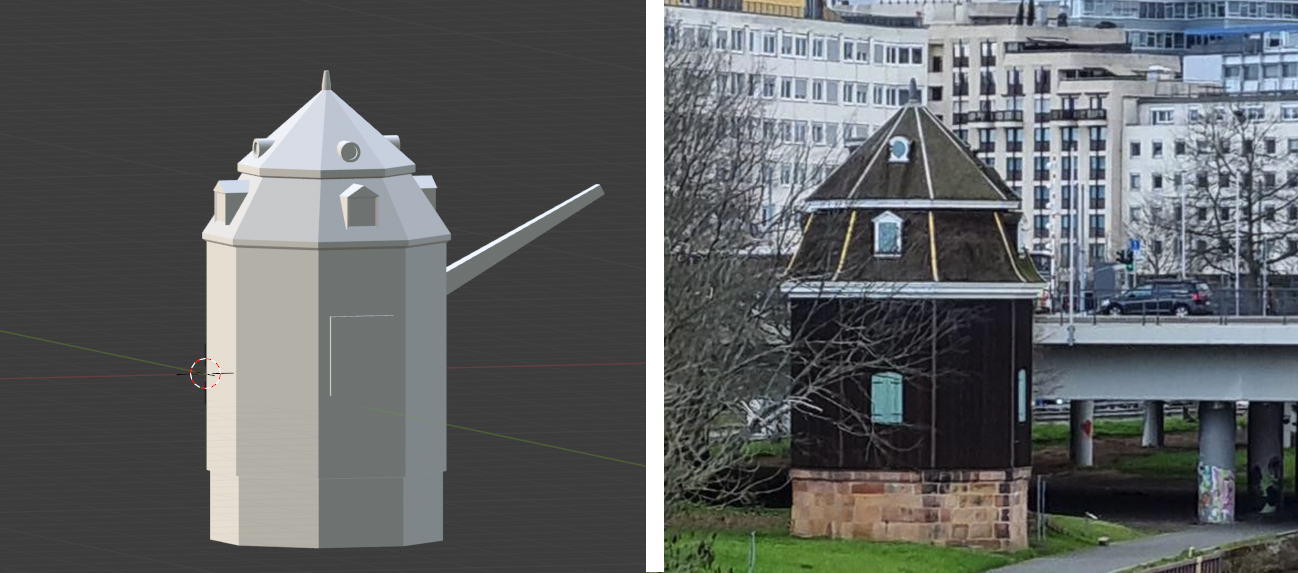
Saarkran in Saarbrücken
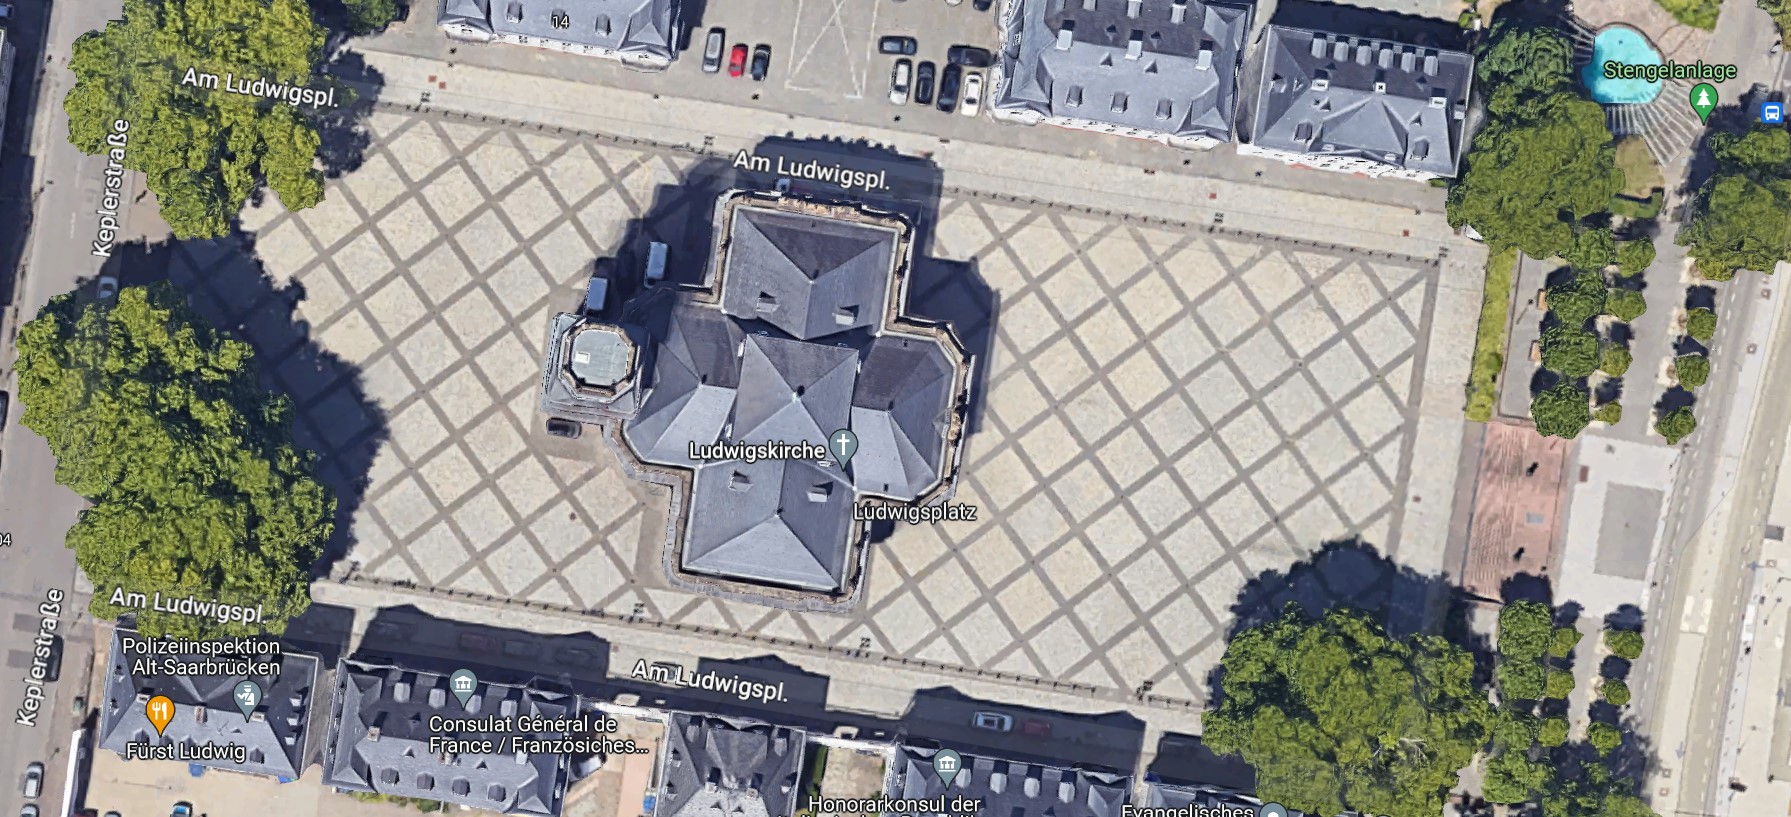
Ludwigskirche in Saarbrücken
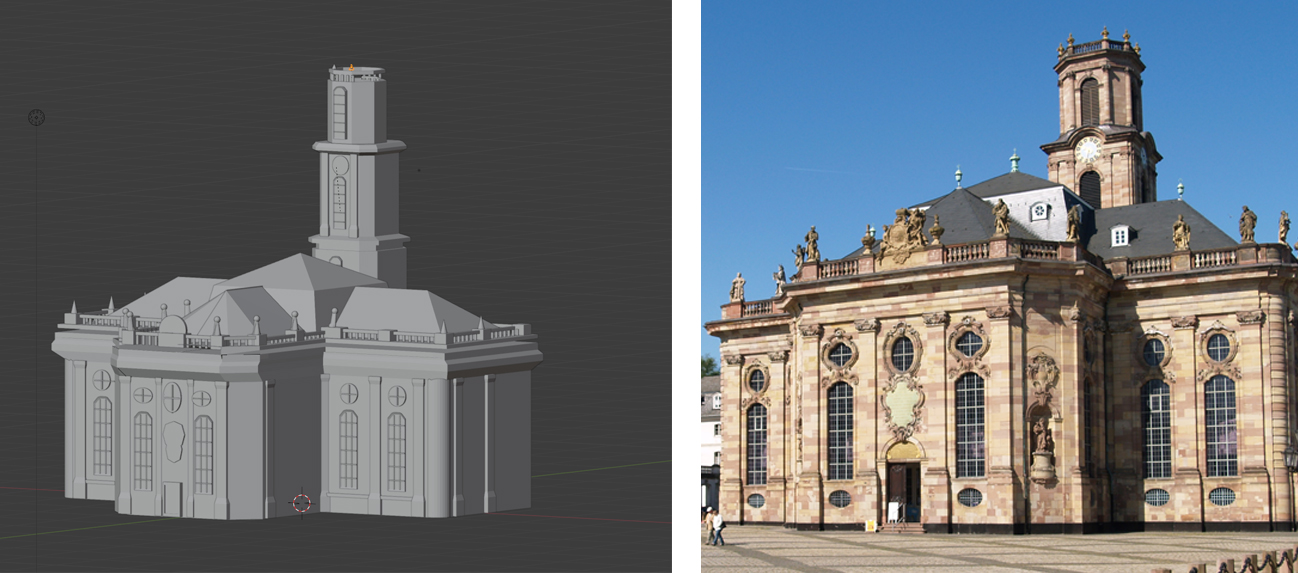
But can you guess what was my problem during the modelling? I haven’t found good pictures of the church taken from above. Actually even with a Google Image Search you won’t find any picture of roof ... so here I’ve used a trick: I've used Google Maps (to get some details about the roof and the correct position of some statues.
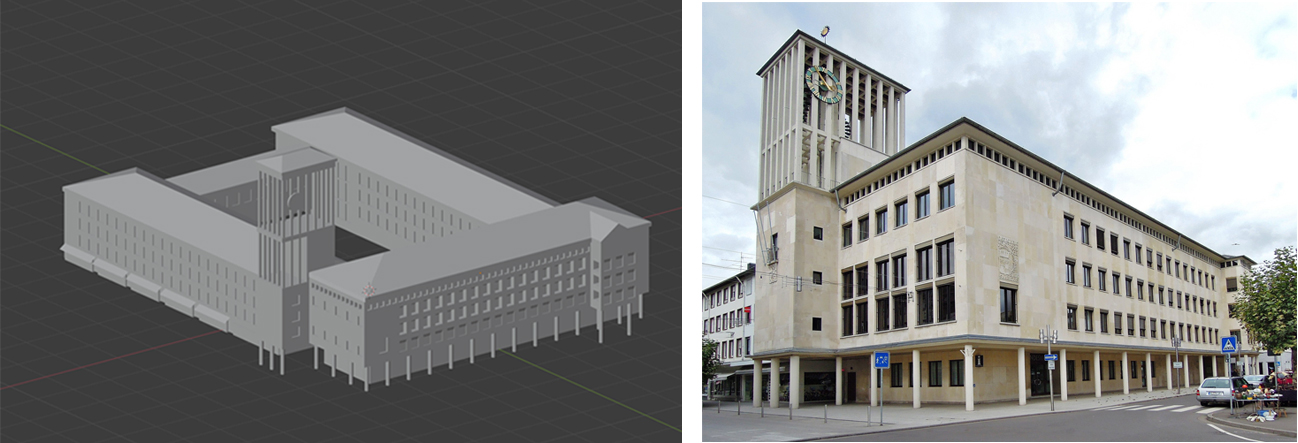
Rathaus of Saarlouis
Großer Markt in Saarlouis
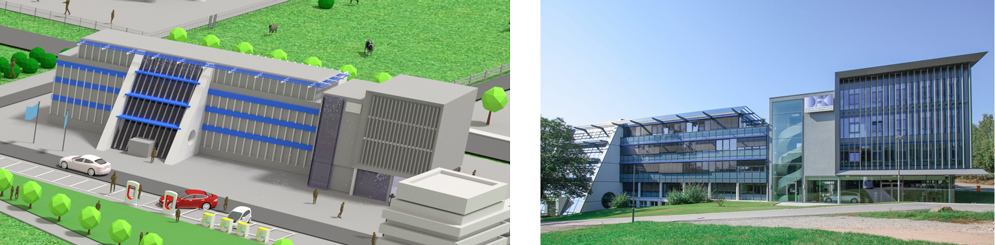
DFKI Building in Saarbrücken
To summarize: try to find one or two very characteristic architectural points of the complex building you’re trying to model and “build” the item around these.
Tip #5: Using the magic trick of Blender’s modifiers.
This is one advantage of modelling historical buildings: the facades were often mathematically “designed” e.g. the space between windows are the same. This simplifies a lot the modelling process, as you only need to model one part of a facade and thanks to Blender’s modifiers you can duplicate as much as needed. The same can be achieved with trees and the placement of solar plants etc…
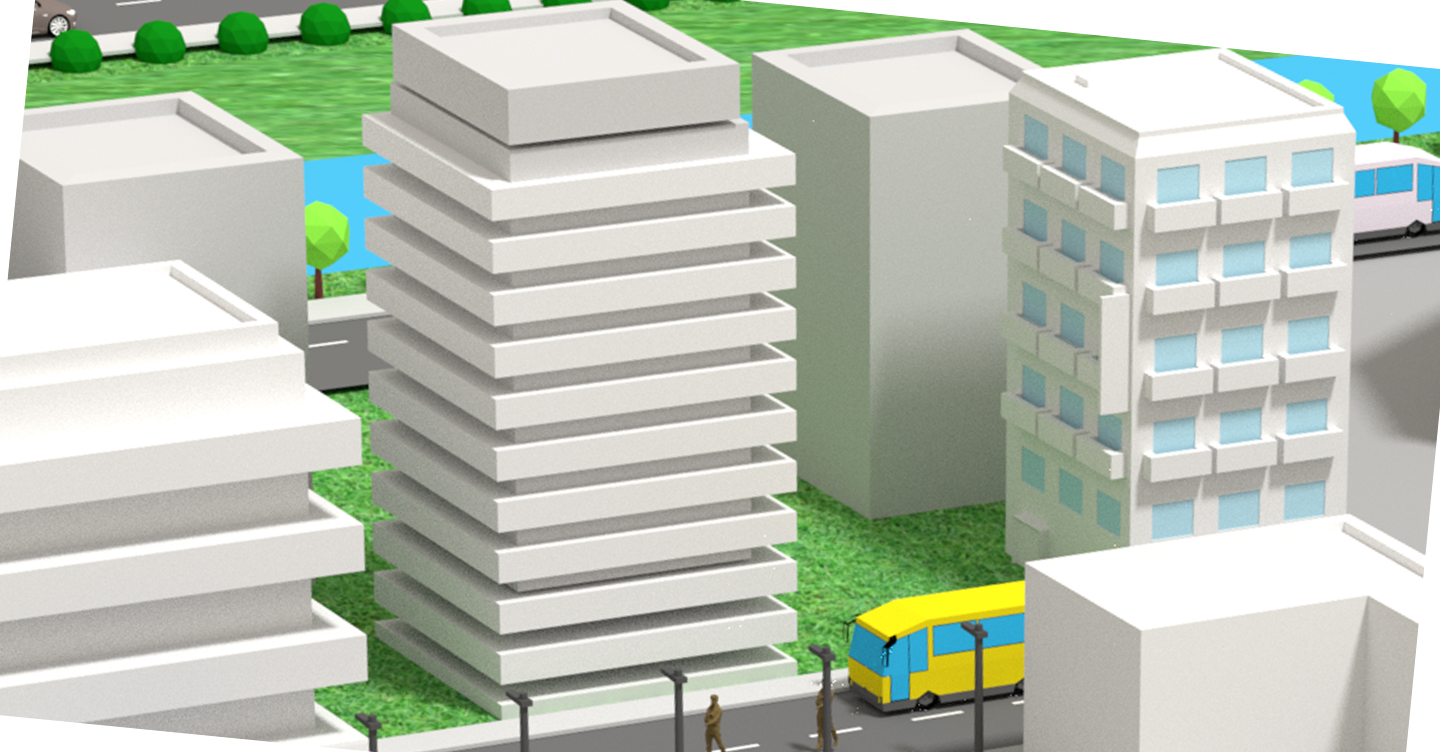
I’ve also used this trick to model modern-looking buildings: these buildings are “only” stacked rectangles and then raised up by using the duplicate / Array modifier of Blender.
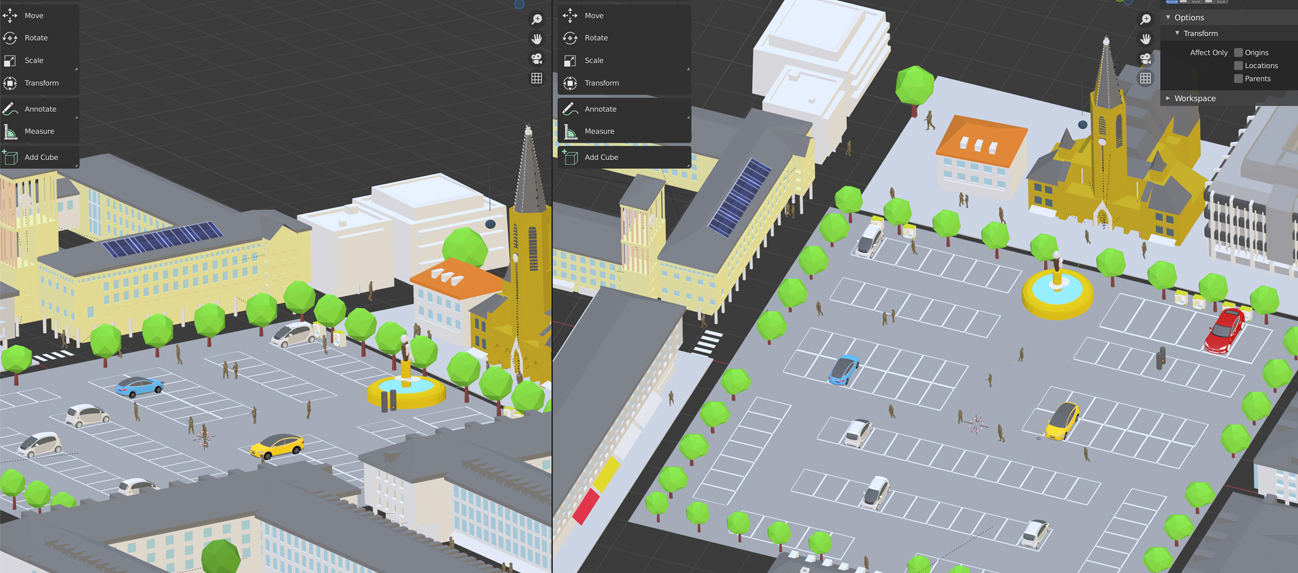
Tip # 6: Dynamize your map: injecting life into it
Have you ever noticed that architects are always putting persons in their conceptual sketches? The two reasons are: you are unconsciously giving the observer a feeling of the scale and secondly you put life into your drawing. In my case I’ve decided to put some life in form of persons and kids running around (a small crowd is even waiting in front of the stadium) and to put some realistic touches, I’ve also added some animals (dogs and cows) to fill up empty spaces such as plazas or fields. 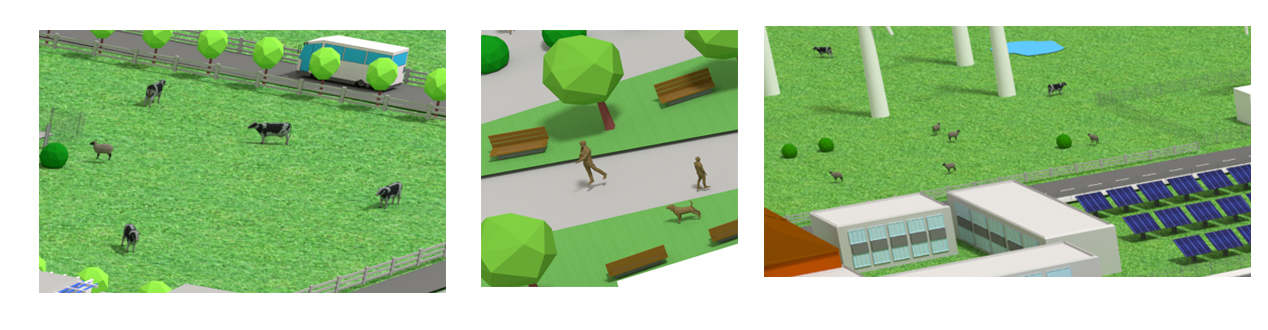 Don’t hesitate to place some POIs like fountains or statues, which are usually places where a lot of person/tourists meet. To make it even more dynamic, add some cars and busses and even an ambulance. You could also add somewhere an accident or a burglar running away.
Of course, take care of not overloading your map with persons or animals as otherwise the realistic effect will directly vanish. At each step ask yourself: “Is my city realistic enough, is it overcrowded, are the placement of the items logic?”. And again: stay low-poly meaning that you don’t need a dog model with fur etc…).
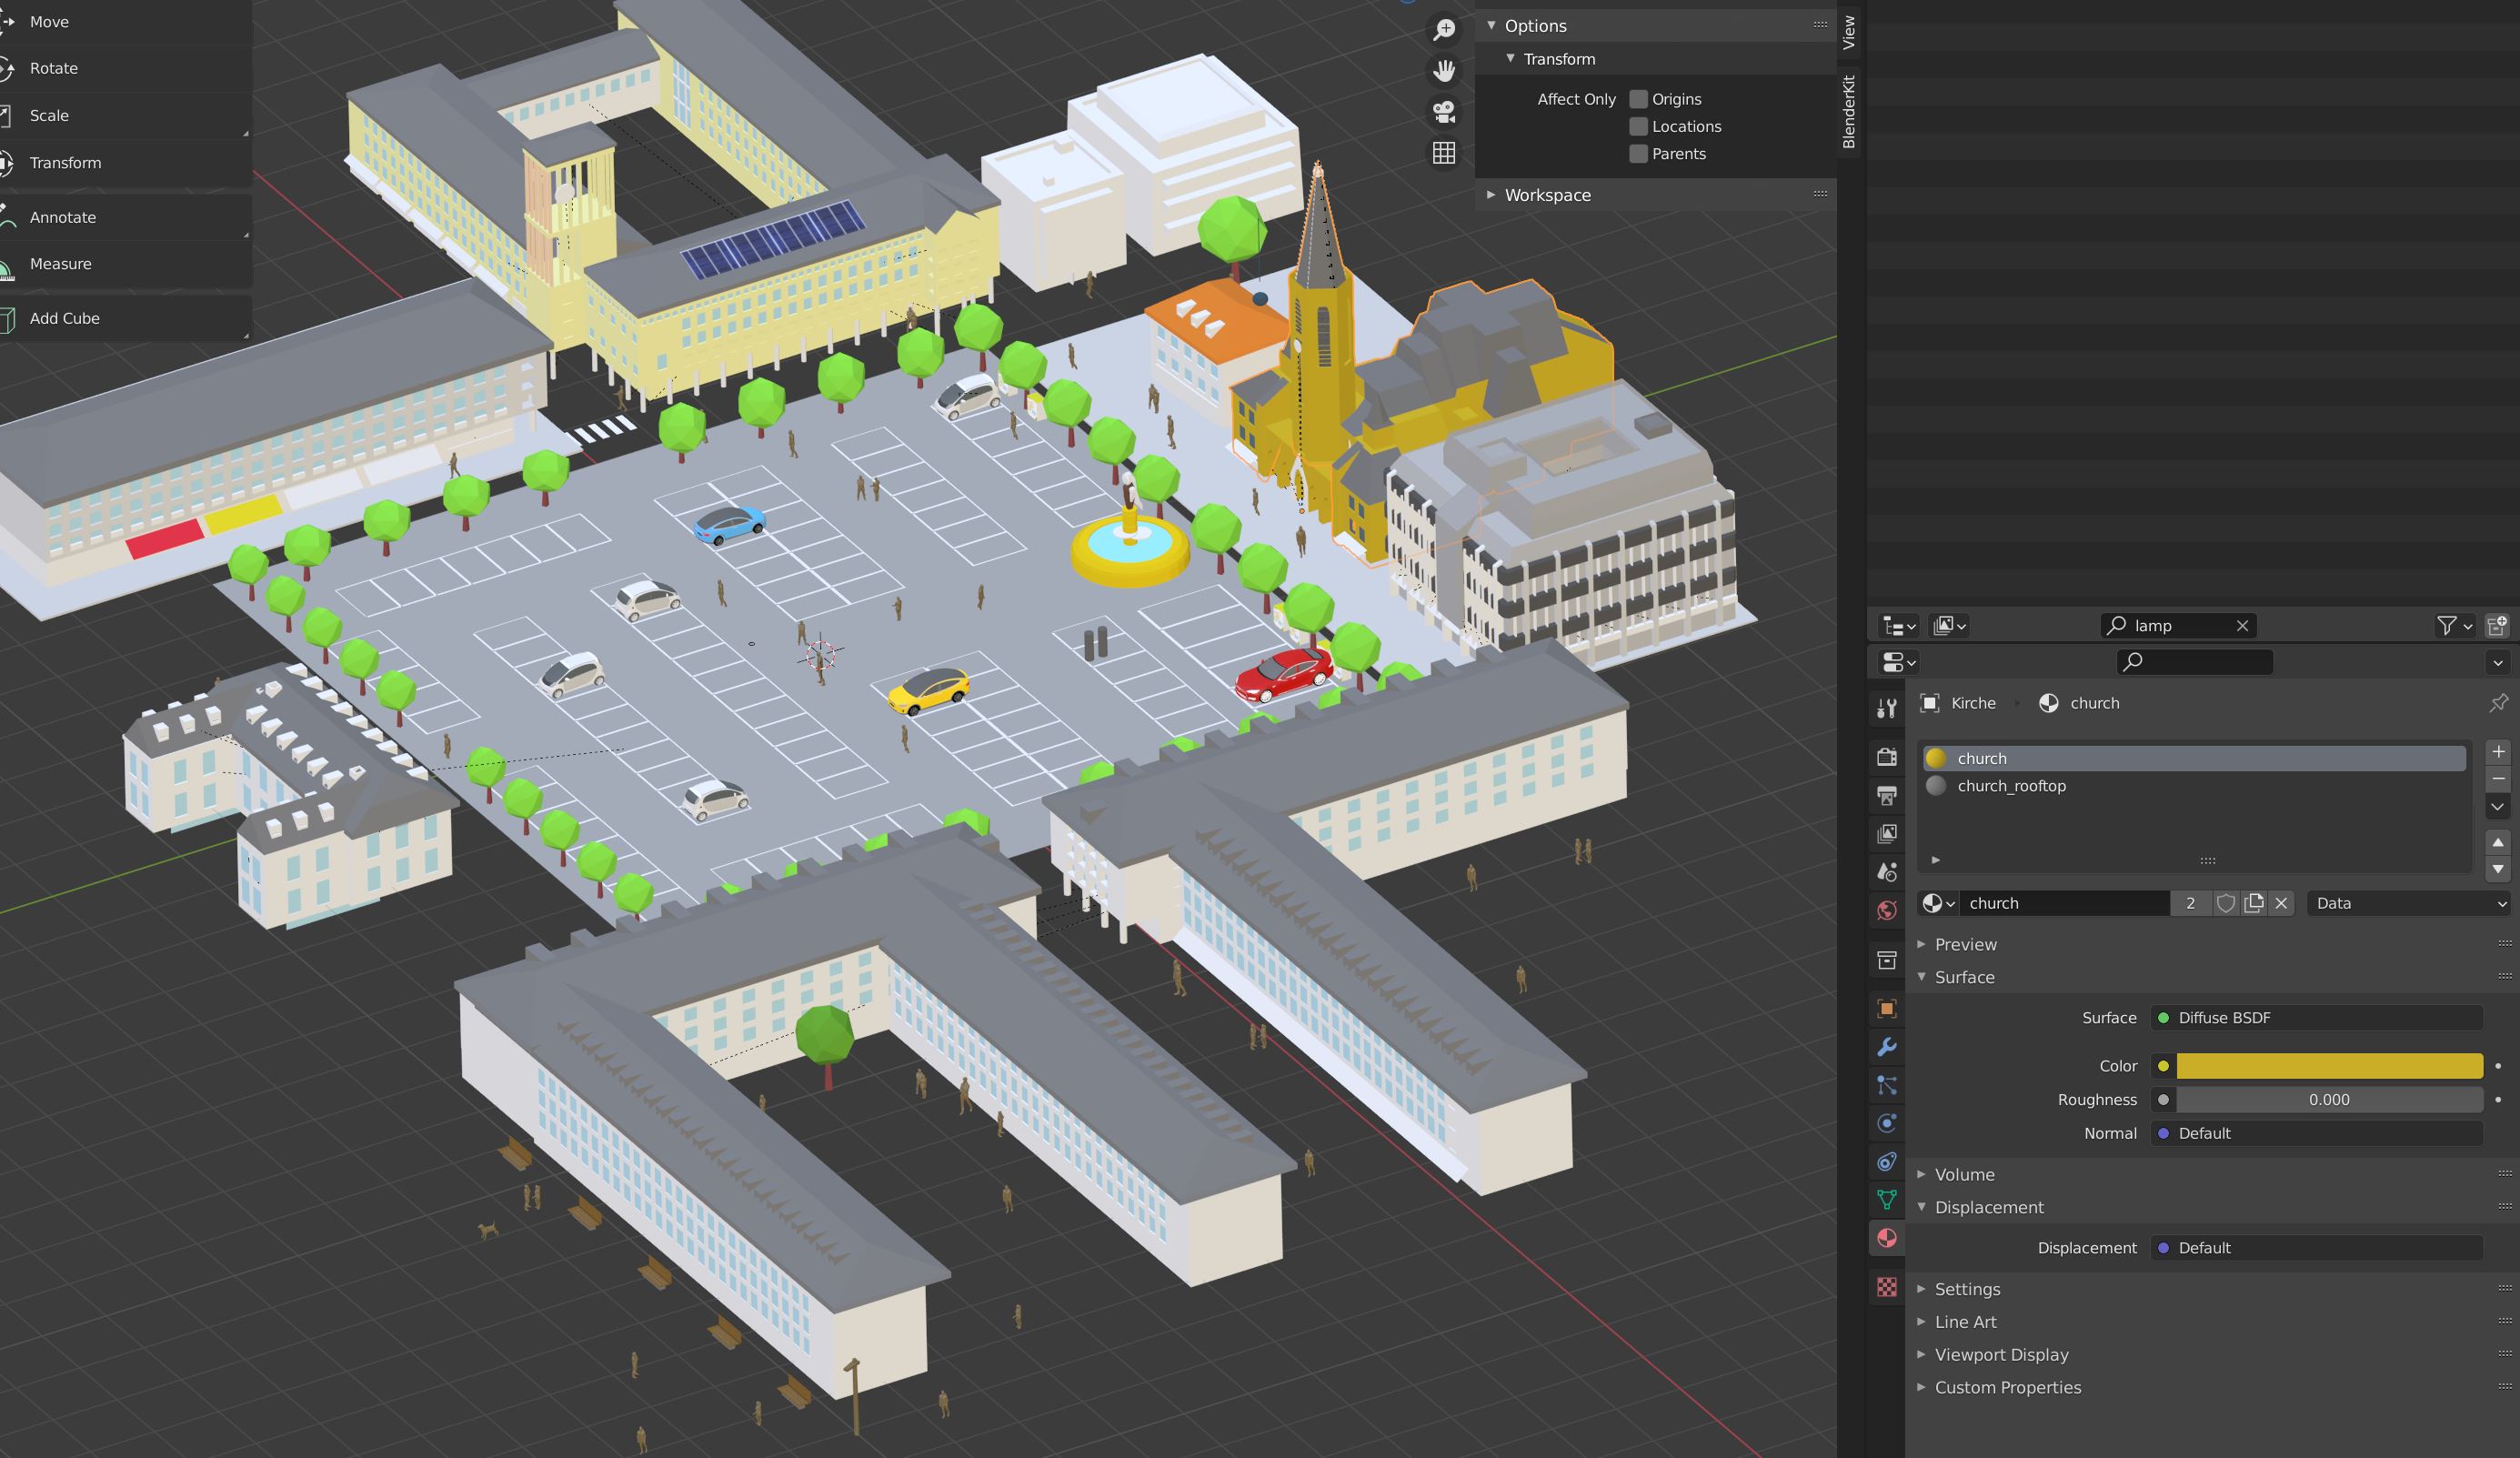
Tip #7: Export and model each building separately.
When starting to model with Blender you will directly feel, that the more complex your buildings are, the slower the process will be. I’ve found out a quick and dirty trick. Store each complex building in a separate .blend file. If you have modifiers, create two files: one with the modifiers (myfileName-with-modifiers.blend.) and another one, in which the modifiers were applied. Try also to simplify your 3D-model by joining faces and decimating the number of polygons for some architectural details.
You will gain a lot of rendering time as Blender won’t need to recalculate the modifiers each time you are going to rotate the view or replacing the building on the map. Another advantage is that you can export the single items as FBX files and thus reimport them for future applications (like in Unity).
When putting the whole models together think like with Lego stones: you have the green baseplate, and you place the stones on it. Each stone is independent from the whole, but all the stones are forming the city.
I also encourage you to do the texturing (Material) directly for each single item by giving each item a specific color name scheme. This will allow to better find your color in the future and to know where it was placed. Of course you are free to use a lot of colors, but always reminder that you are in a low poly world and the colors "are allowed" to look a little bit cartoonish.
In my case the whole final map (including textures) - has a weight of about 1,9 GB (as .blend file)
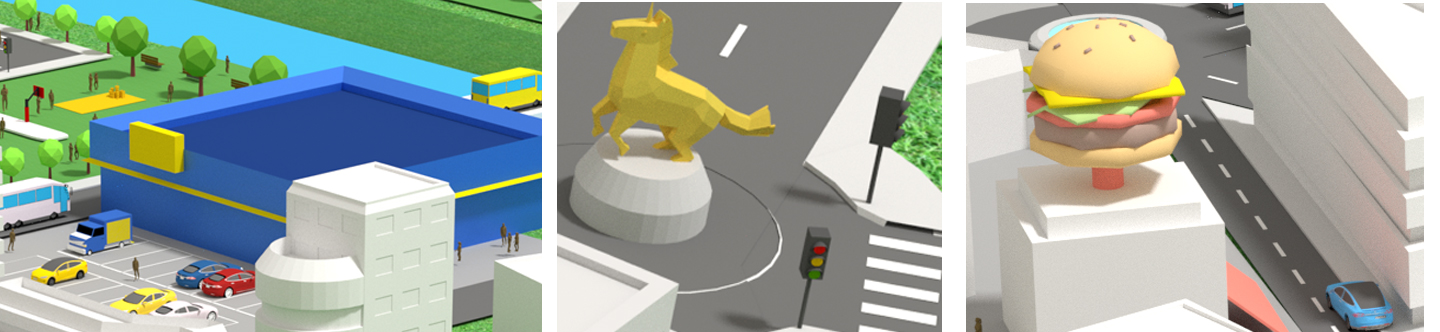
Tip #8: Easter eggs!
I always incorporate Easter eggs in my designs. Why? If Easter eggs are discovered, you will directly put a smile on the observer. Obviously when you have a very dense map with a lot of houses and stuff to observe, people tend to take their time to watch. It’s like watching a miniature world. Here I’ve put an IKEA-Lookalike store (it’s the IKEA of Ensdorf), well-known gas station, Tesla Superchargers, a unicorn and a giant burger store (which actually does not exist!).
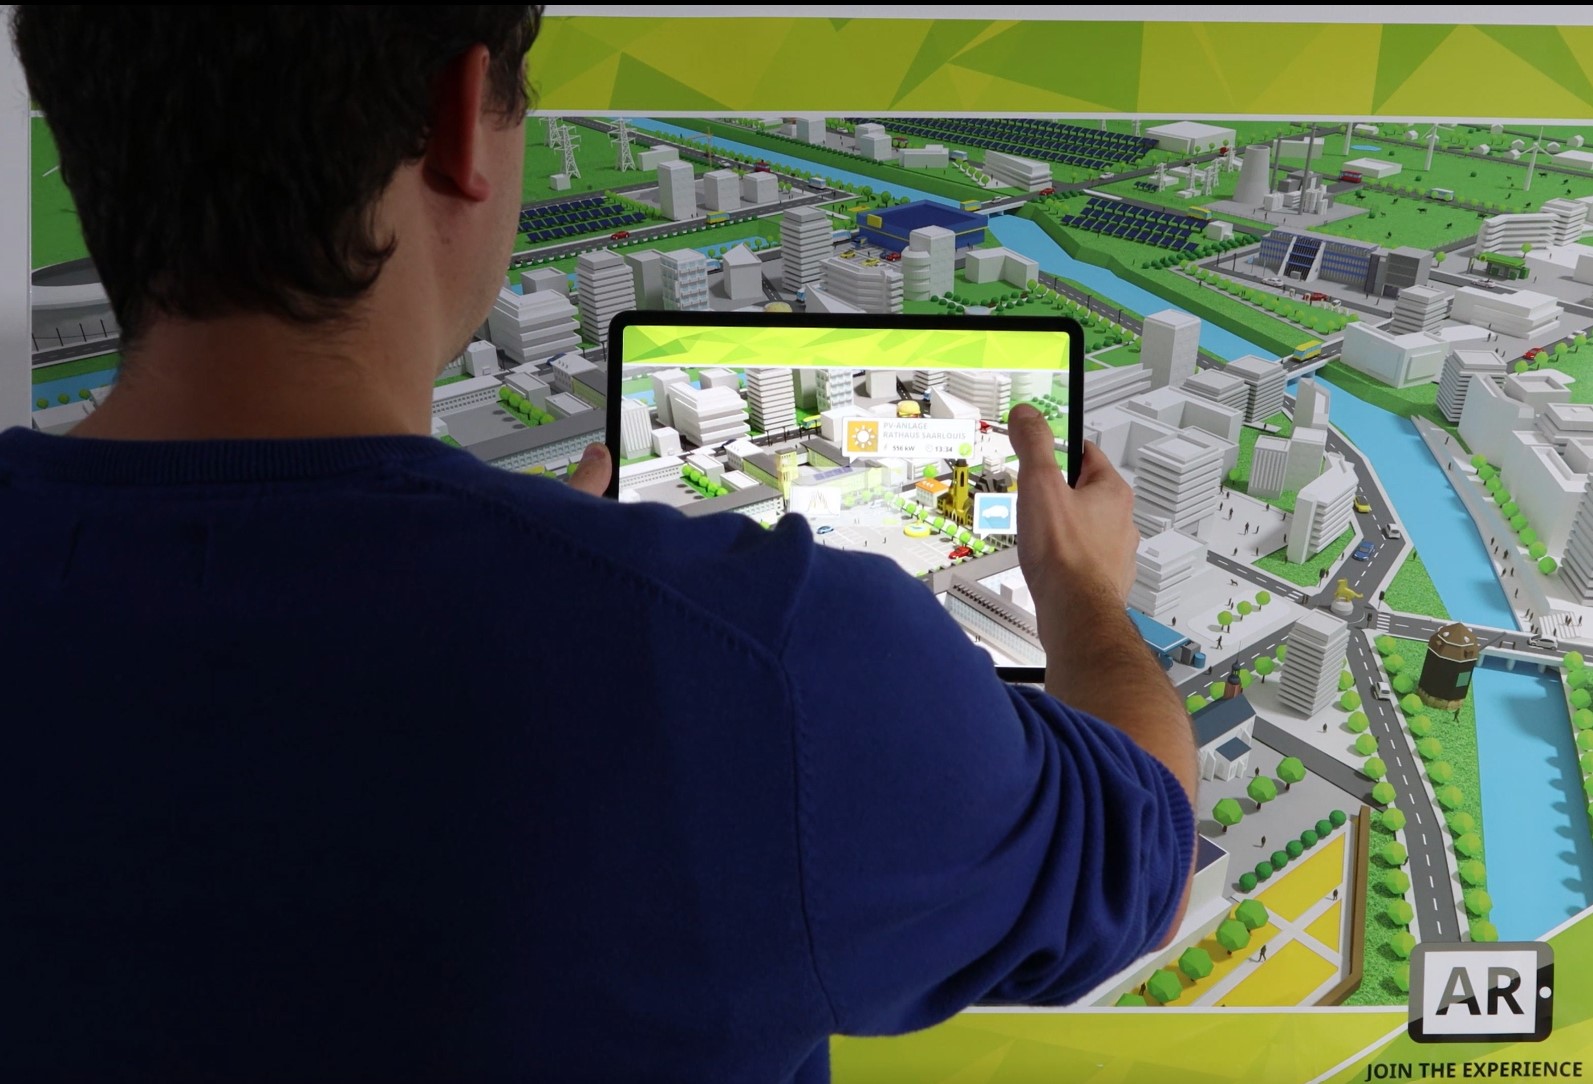
Tip #9: Augment it!
Now that you have rendered your city it’s time to do something with your rendering.
Of course, you could print it as poster for your showroom or your customer. But 2D is sooo oldschool 😉 Why not using Unity and Vuforia and displaying over POIs additional information such as the real-time production of solar panels or a description of the building you are currently hovering on?